ECE 1100 Discovery Project - Bluetooth Speaker
This project for ECE 1100, inspired by the senior project of my friend Aaron Logan whose documentation I referenced, involves making a bluetooth speaker from basic parts like bare speakers, an amp board, and a bluetooth board. Throughout the course of this project, I have become more familiar with using bluetooth, and I have familiarized myself more with the HIVE markerspace.
Resources
Materials
- Speakers (link)
- Bluetooth Board (link)
- Amp Board (link)
- TRS 3.5mm Audio Cable (link)
- Switch (link)
- Cardboard
Files
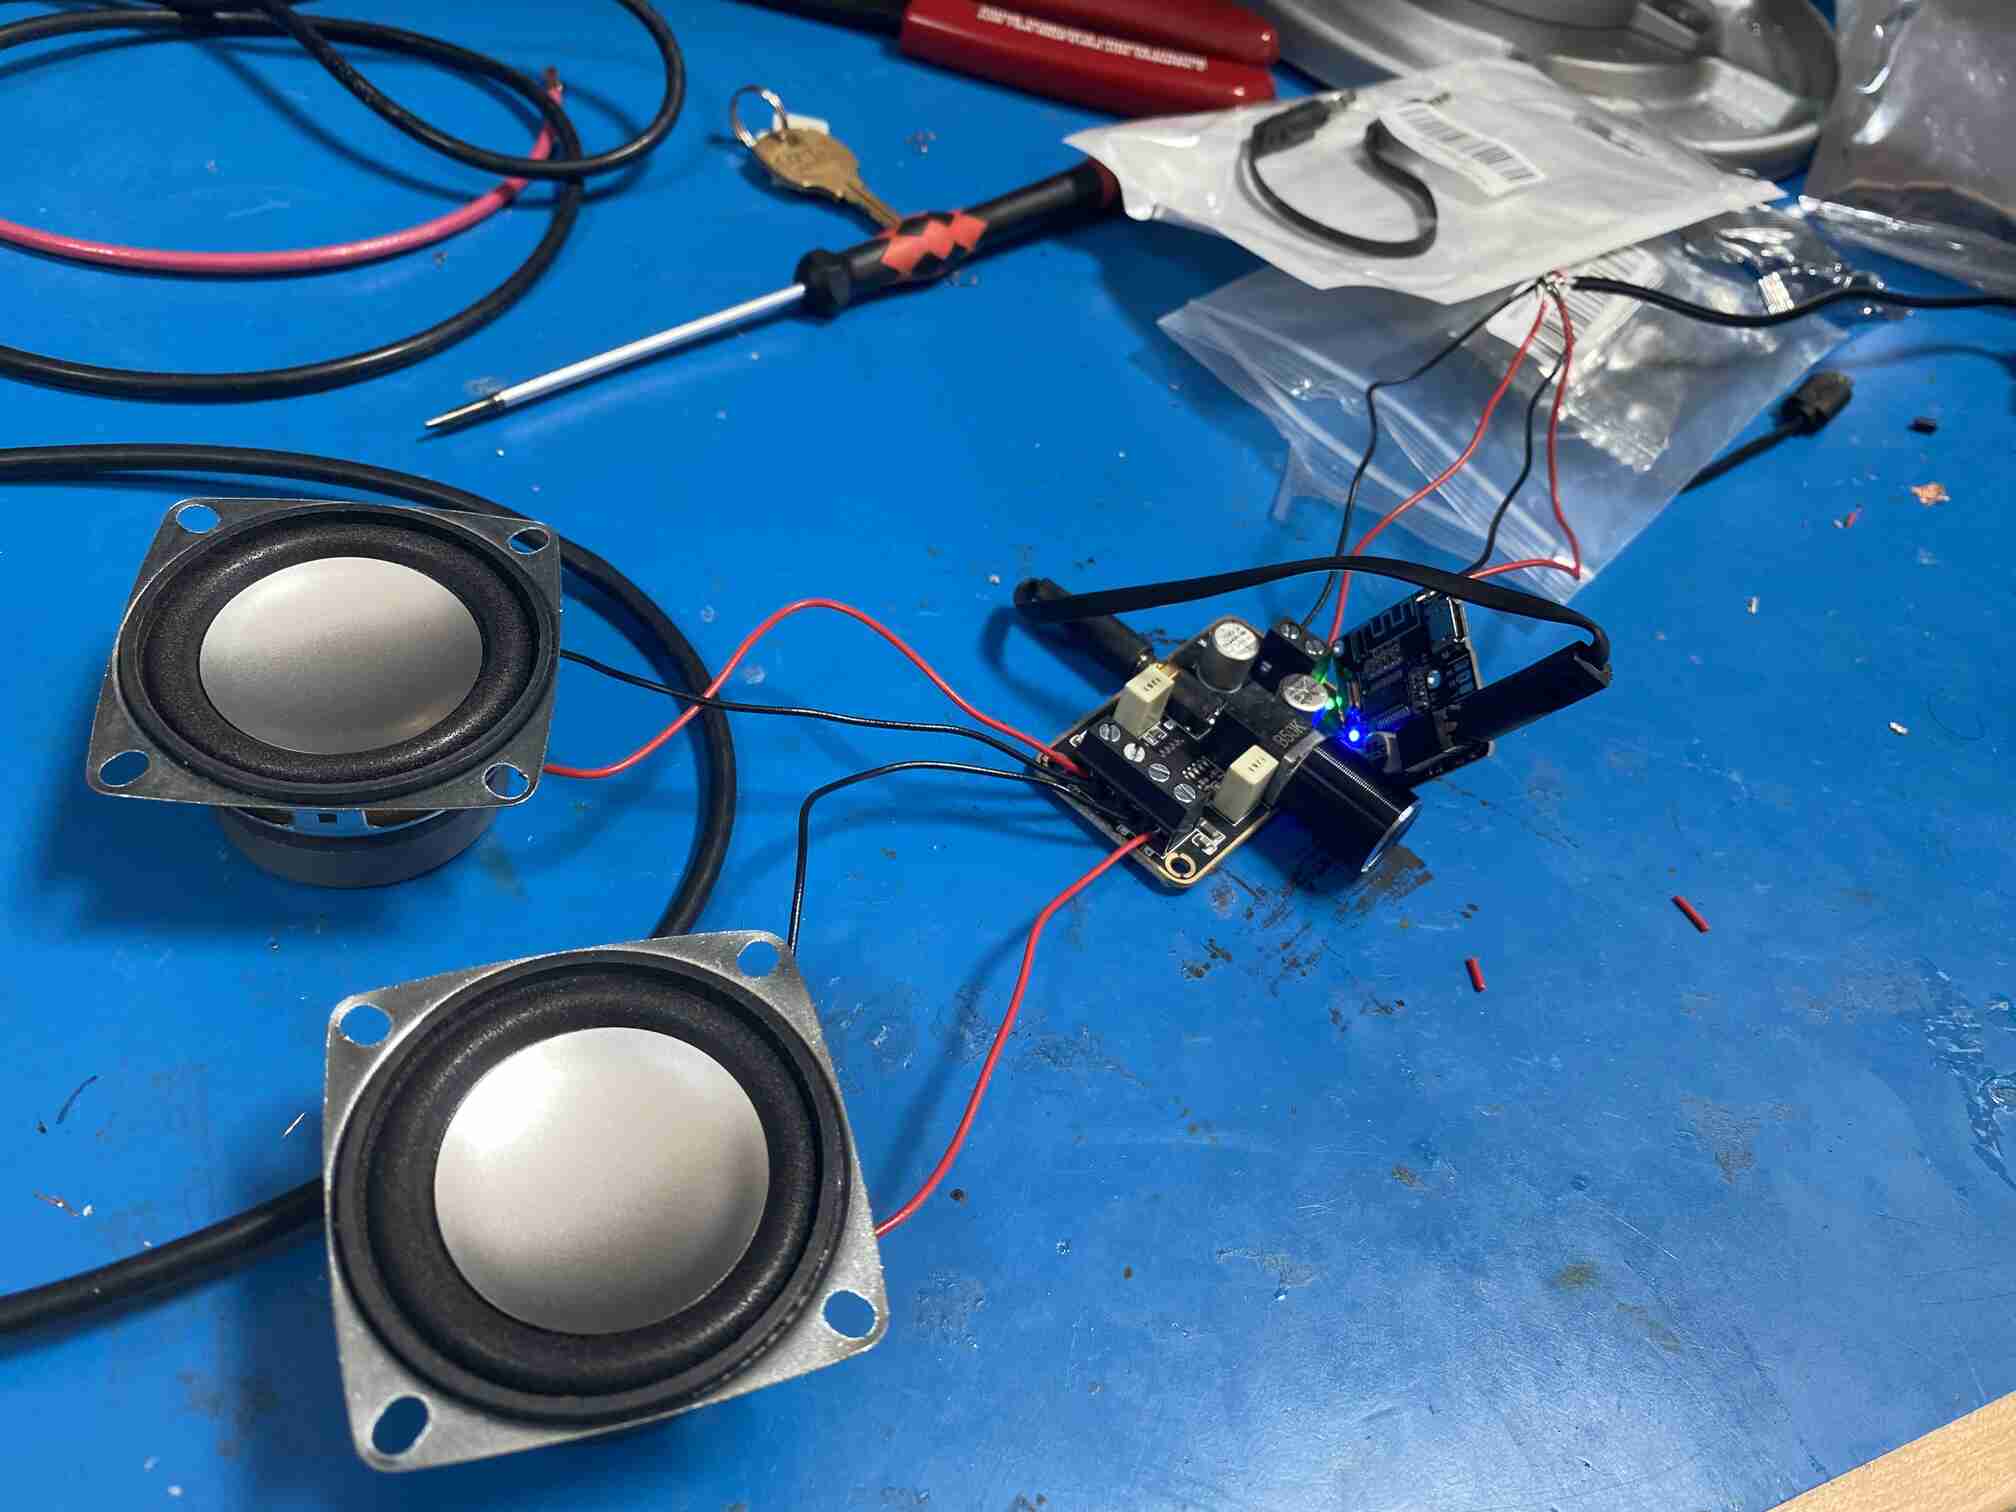
Initial Wiring
The wiring was fairly self explanitory as everything was well labeled. Each speaker had a positive and negative wire to connect to the corresponding port on the amp board, and they were labled by left and right positive and negative channels. To get the data to the amp board, it had to be connected to the bluetooth board with the TRS 3.5mm audio cable. Additionally, both the amp board and bluetooth board had to be connected to power and ground while the amp board would provide power to the speakers. To get this power, I stripped a usb cable and used its power and ground connections.
Cardboard Packaging
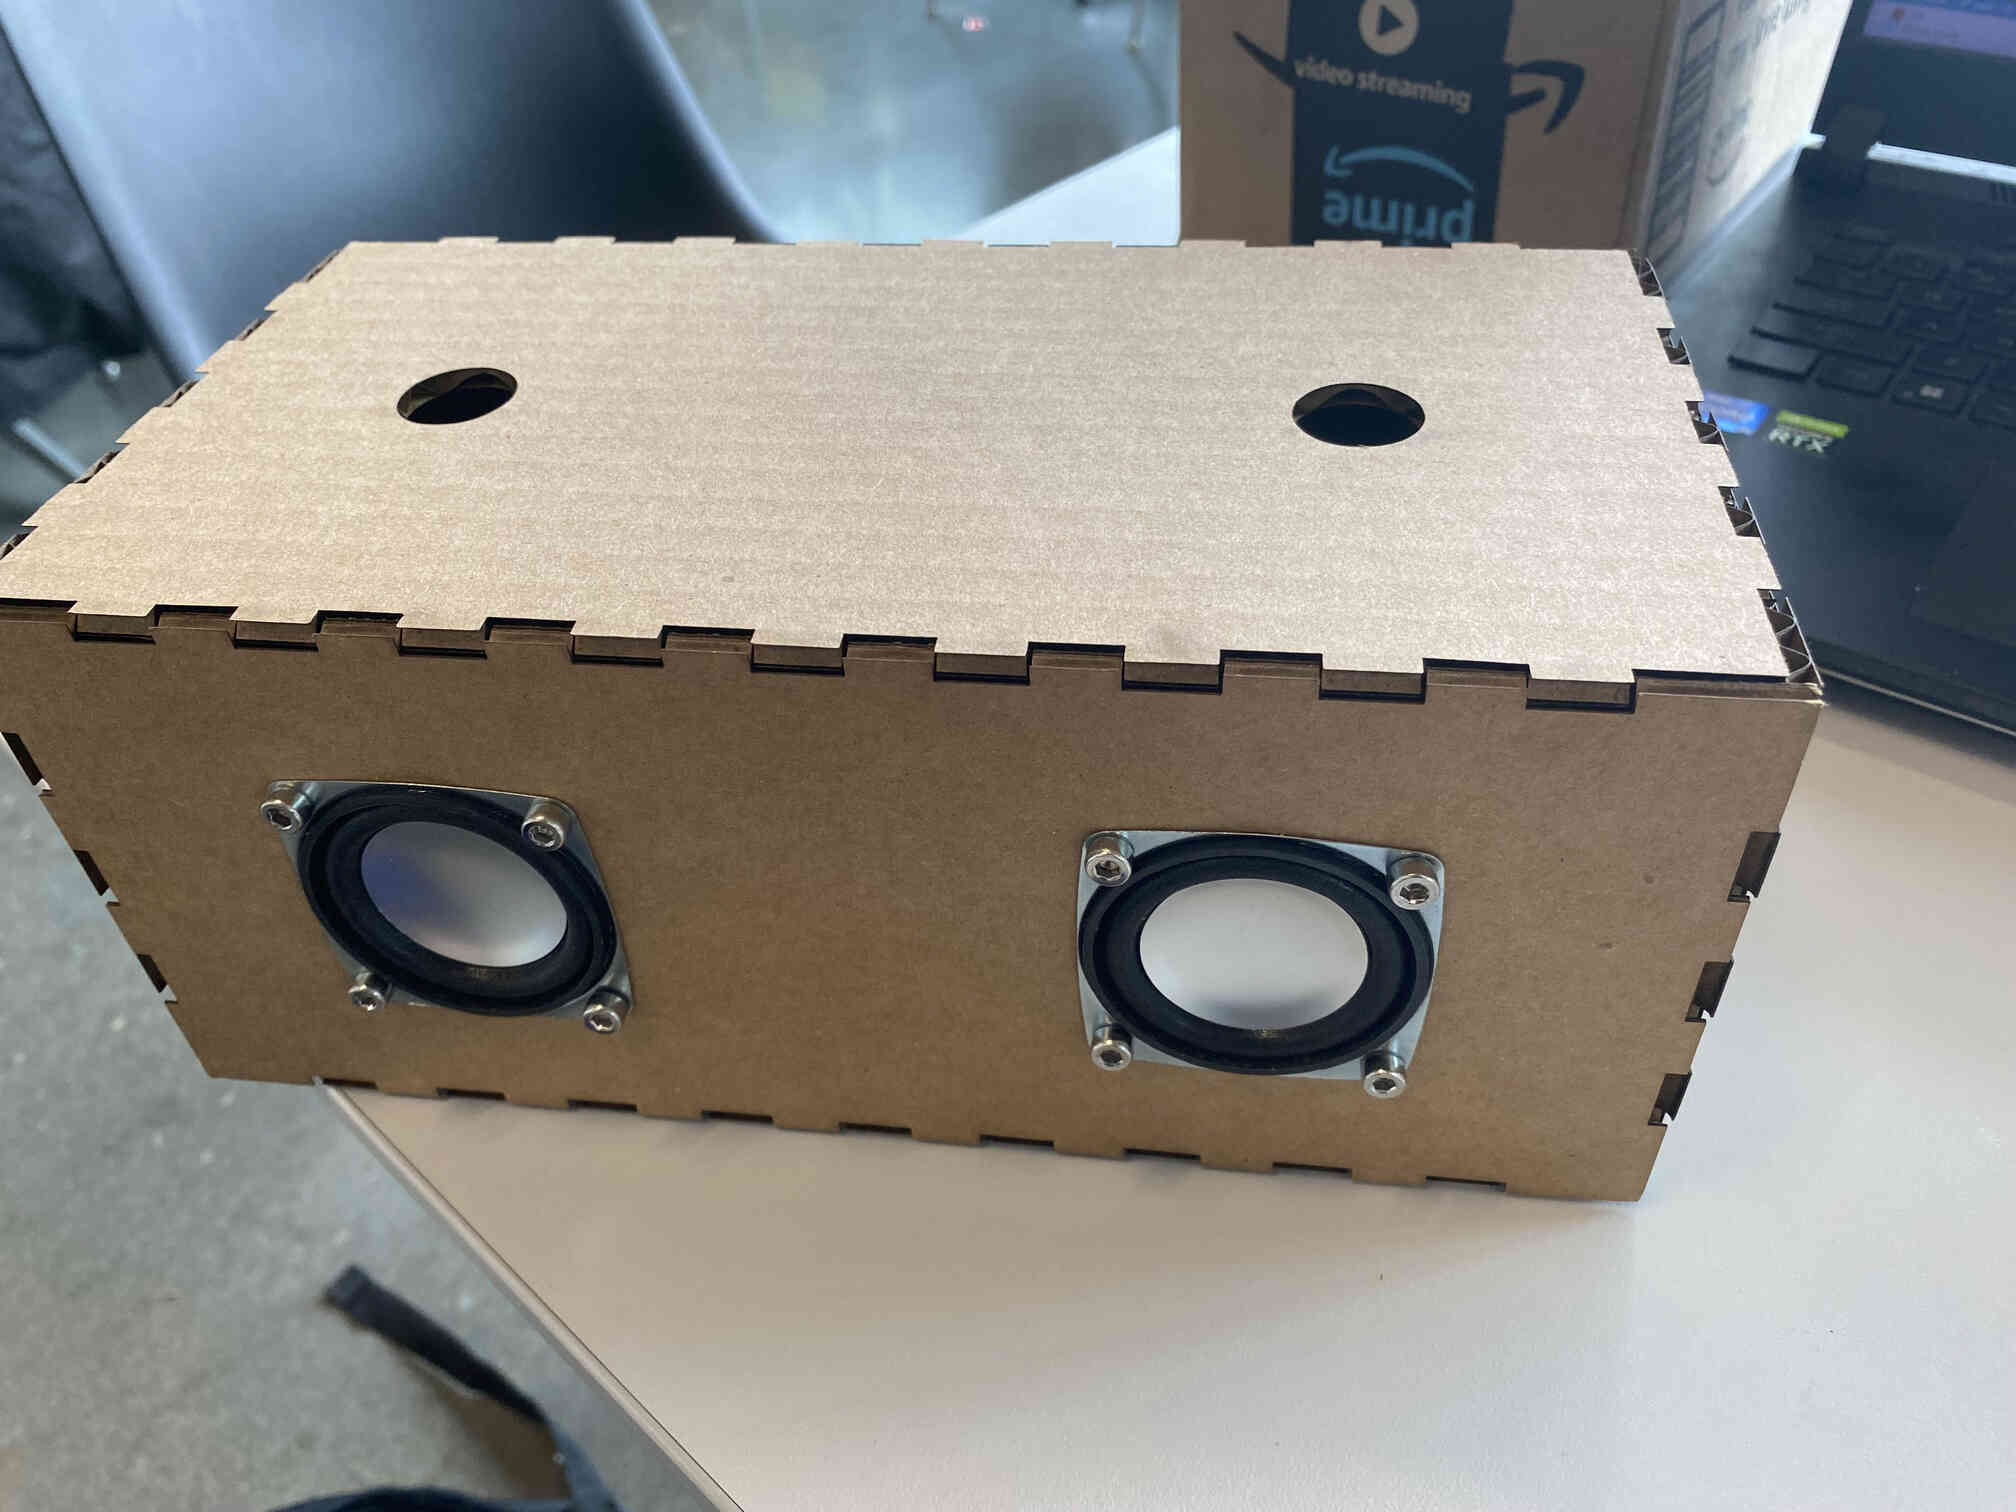
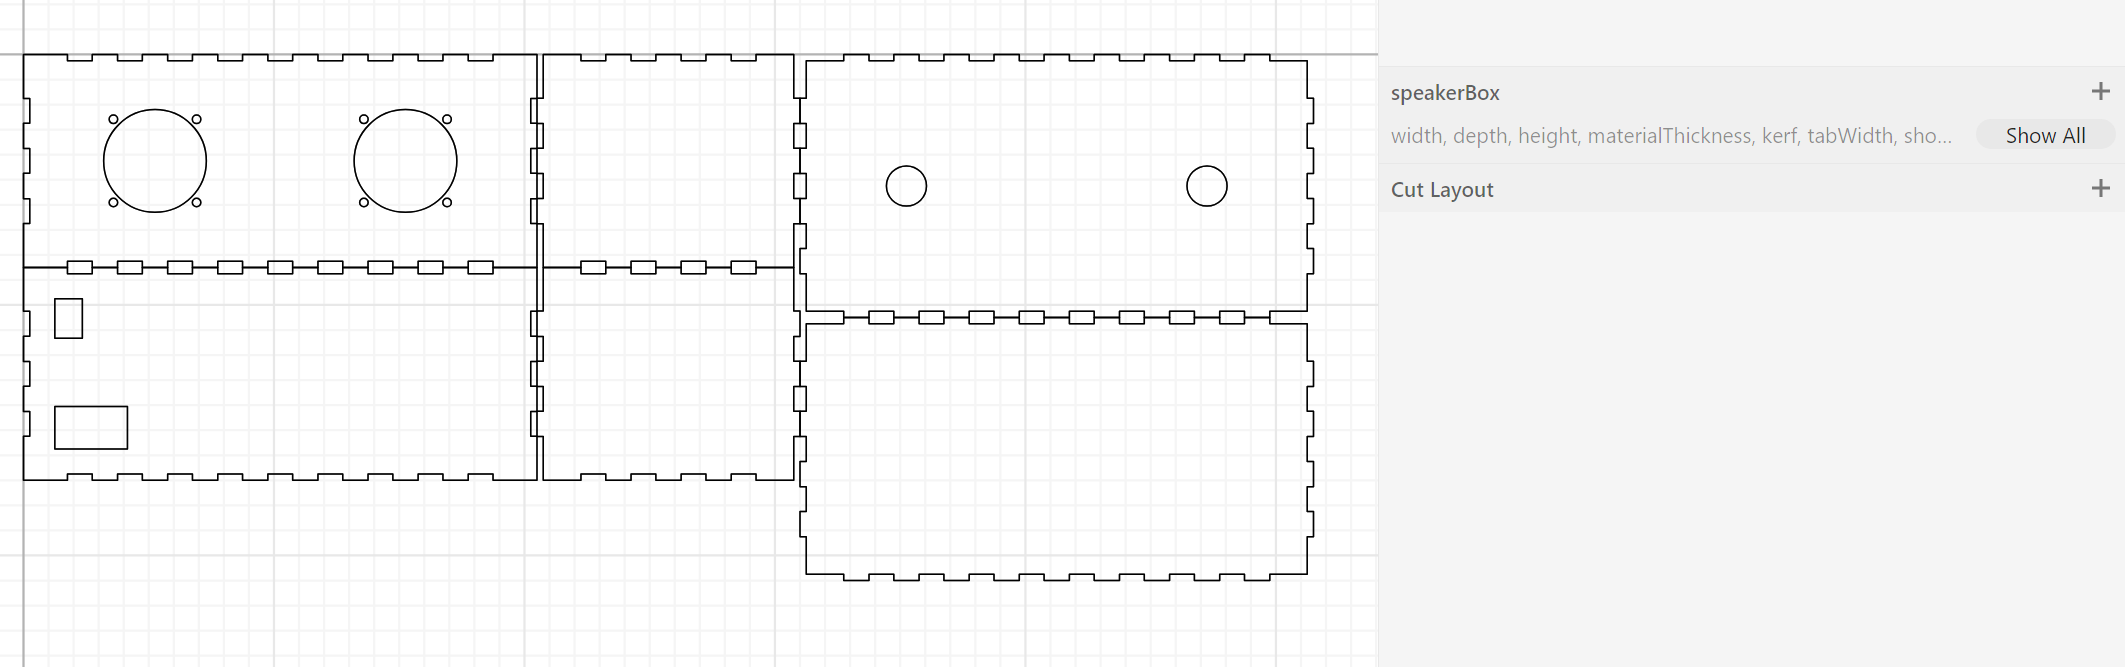
Laser Cut Box
To contain the mild mess of wires and house the speakers, I decided to make a tab box. I had planned to do so with 1/8 inch plywood, but the hive ran out of wood, so I had to use cardboard, which is not a bad first iteration. I used this tab box template in cuttle to create the box and added additional parametric holes for the various parts.
3D Printed USB Mount
Just having a tab box with holes, however would not be able to properly house the usb breakout board, so I created a 3D printed part in Fusion360 that would go into the box and mount the breakout board.
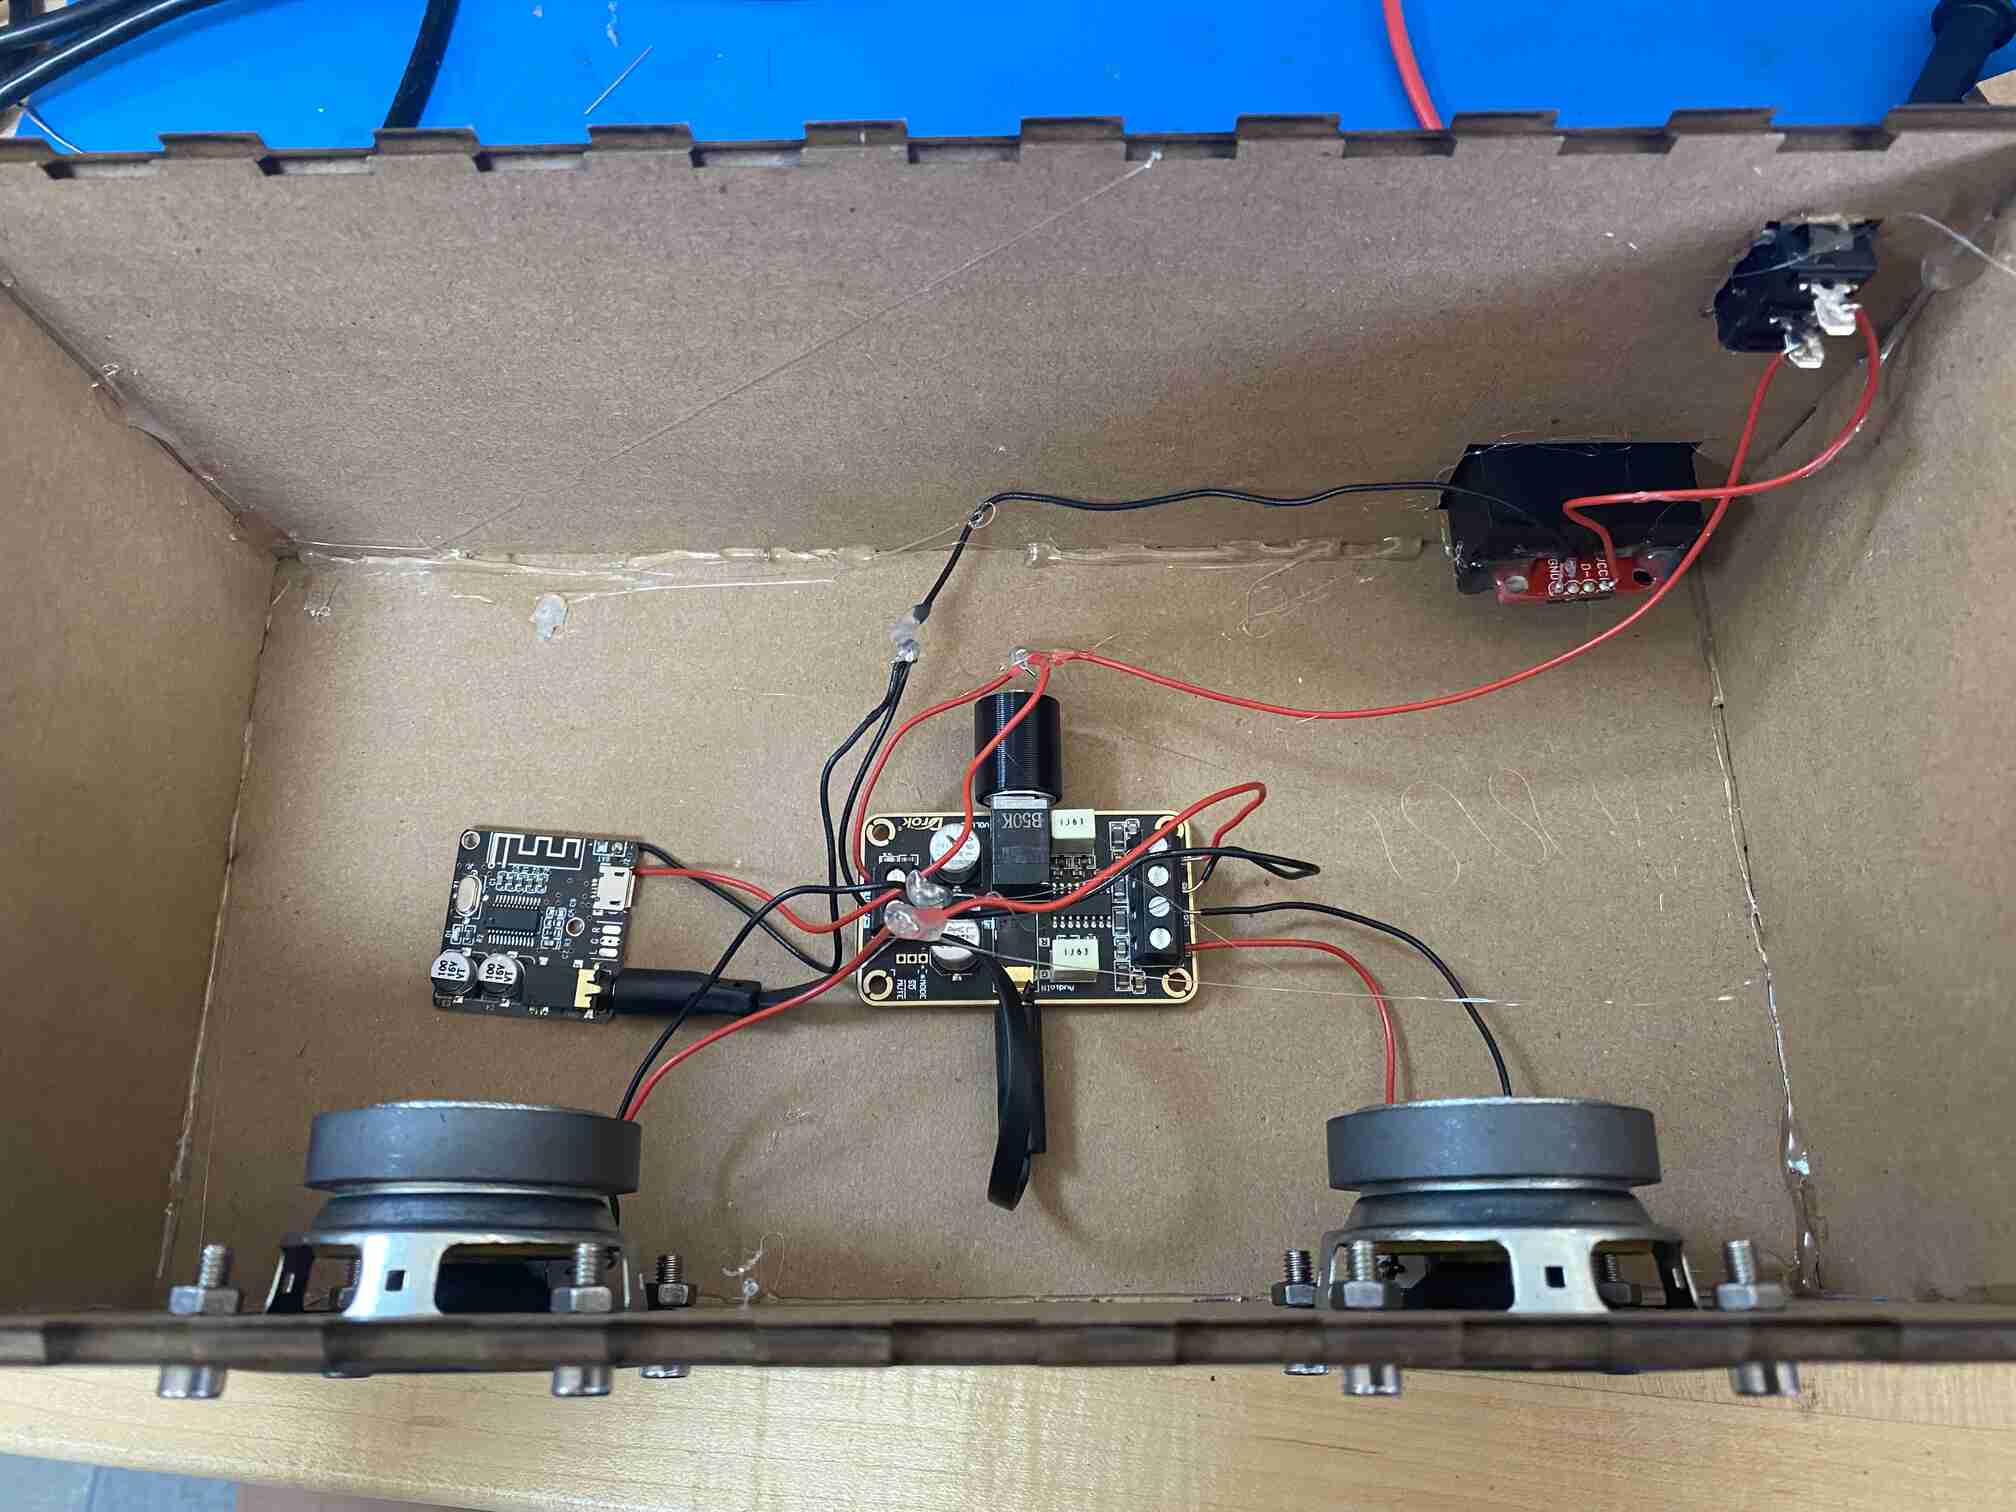
Putting It All Together
In order to put everything together, I had to resolder most of the parts both to maneuver it in and to have long enough connections. The speakers had holes for M4 bolts, so I used those to fasten them to the box. I used hot glue to hold everything else together and to put over any exposed wire to add insulation. At this point, I also added the switch in.